Hosting : Deploy Bakery Application
Build locally first
npm run build
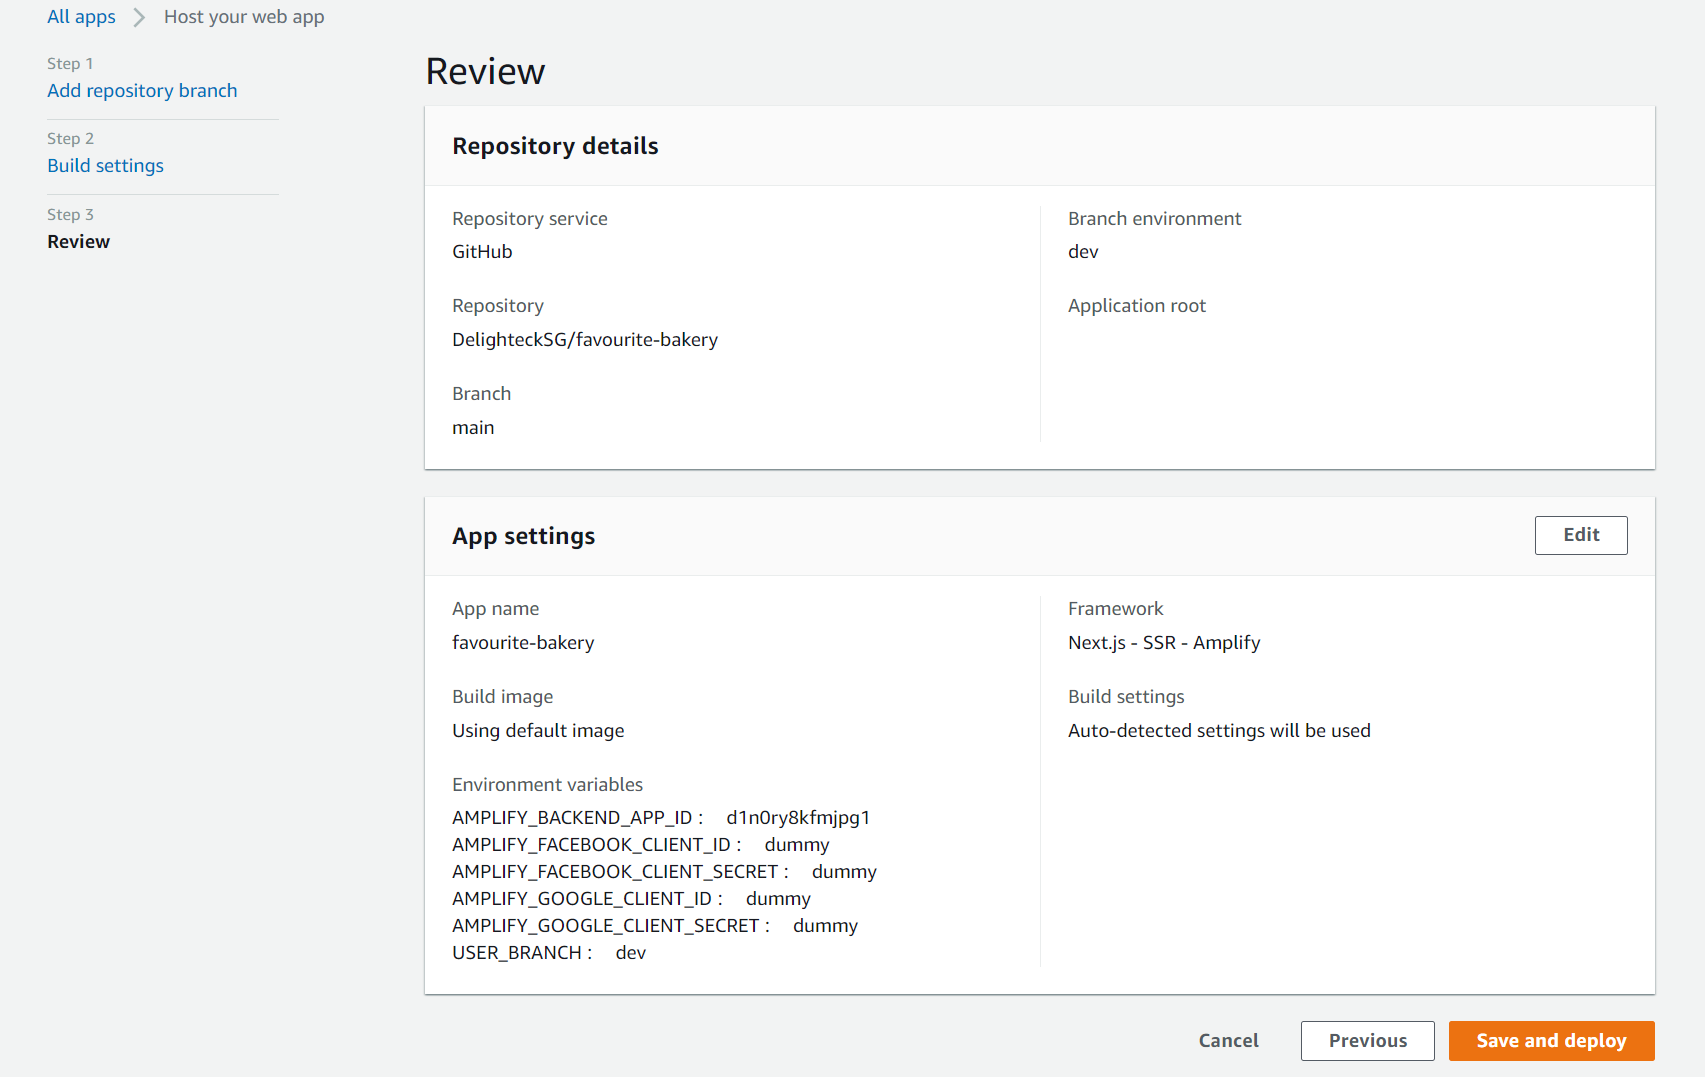
Fix errors if any, Once we're able to build locally, we can connect our github repo branch to amplify, so that it'll automatically build.
Goto project in Amplify on AWS Console,
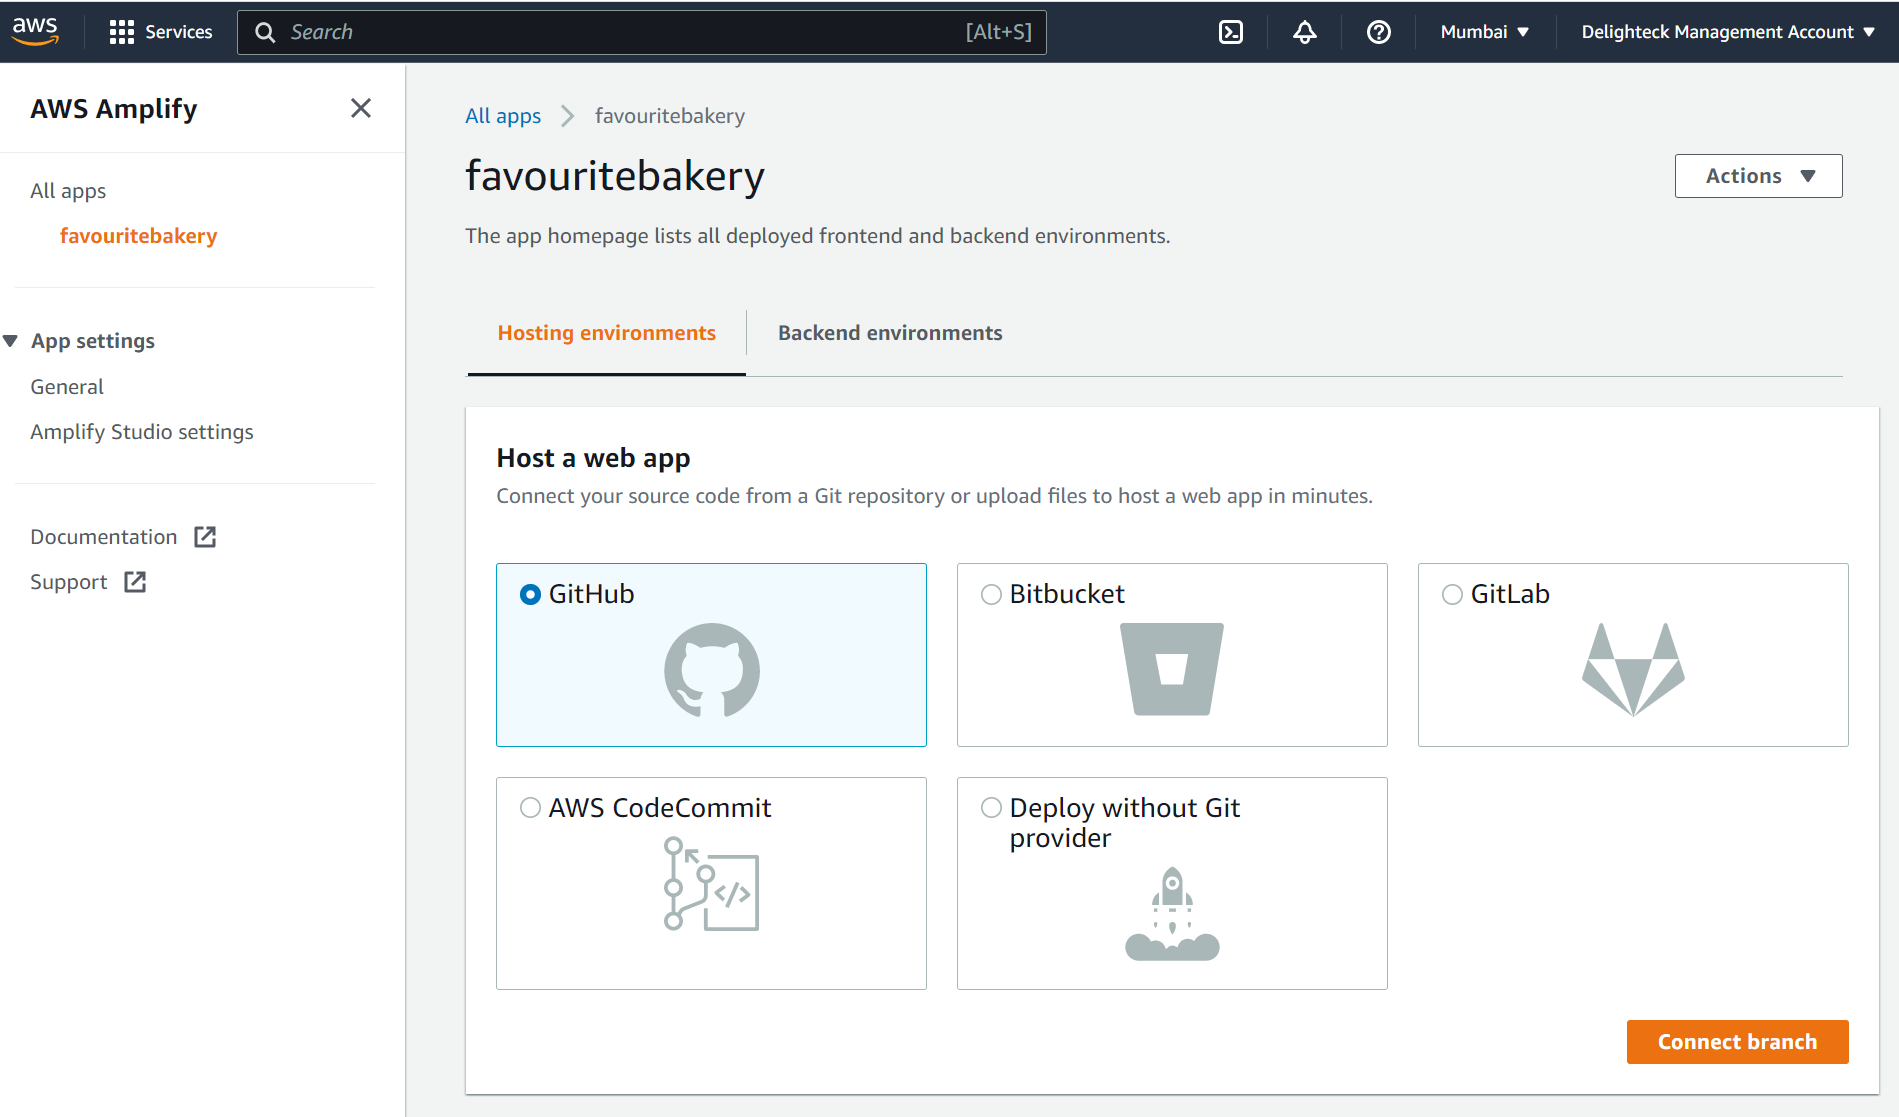
Give github permissions to your repo and select it.
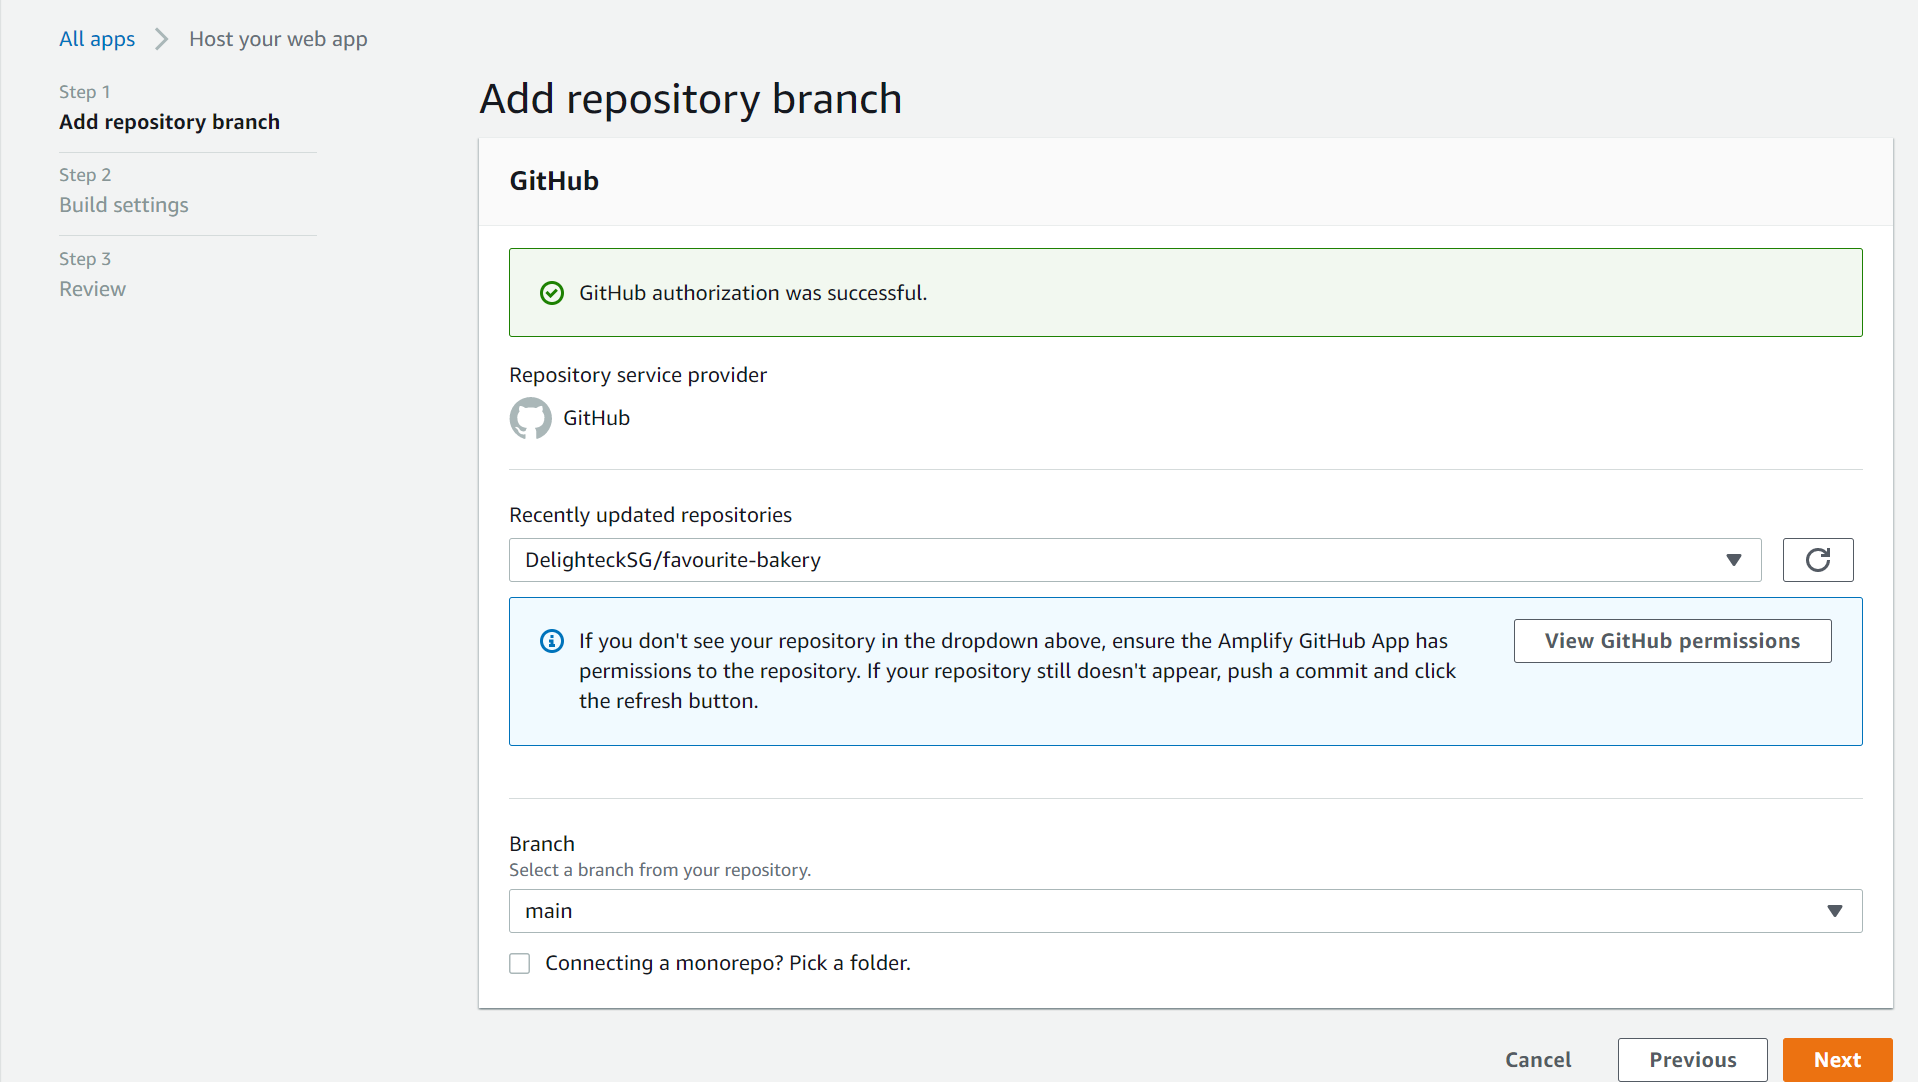
Go to Advanced settings, and add the below environment Variables, Click Next
AMPLIFY_FACEBOOK_CLIENT_SECRET, AMPLIFY_FACEBOOK_CLIENT_ID,
AMPLIFY_GOOGLE_CLIENT_ID,
AMPLIFY_GOOGLE_CLIENT_SECRET
Add a custom domain with a free SSL certificate
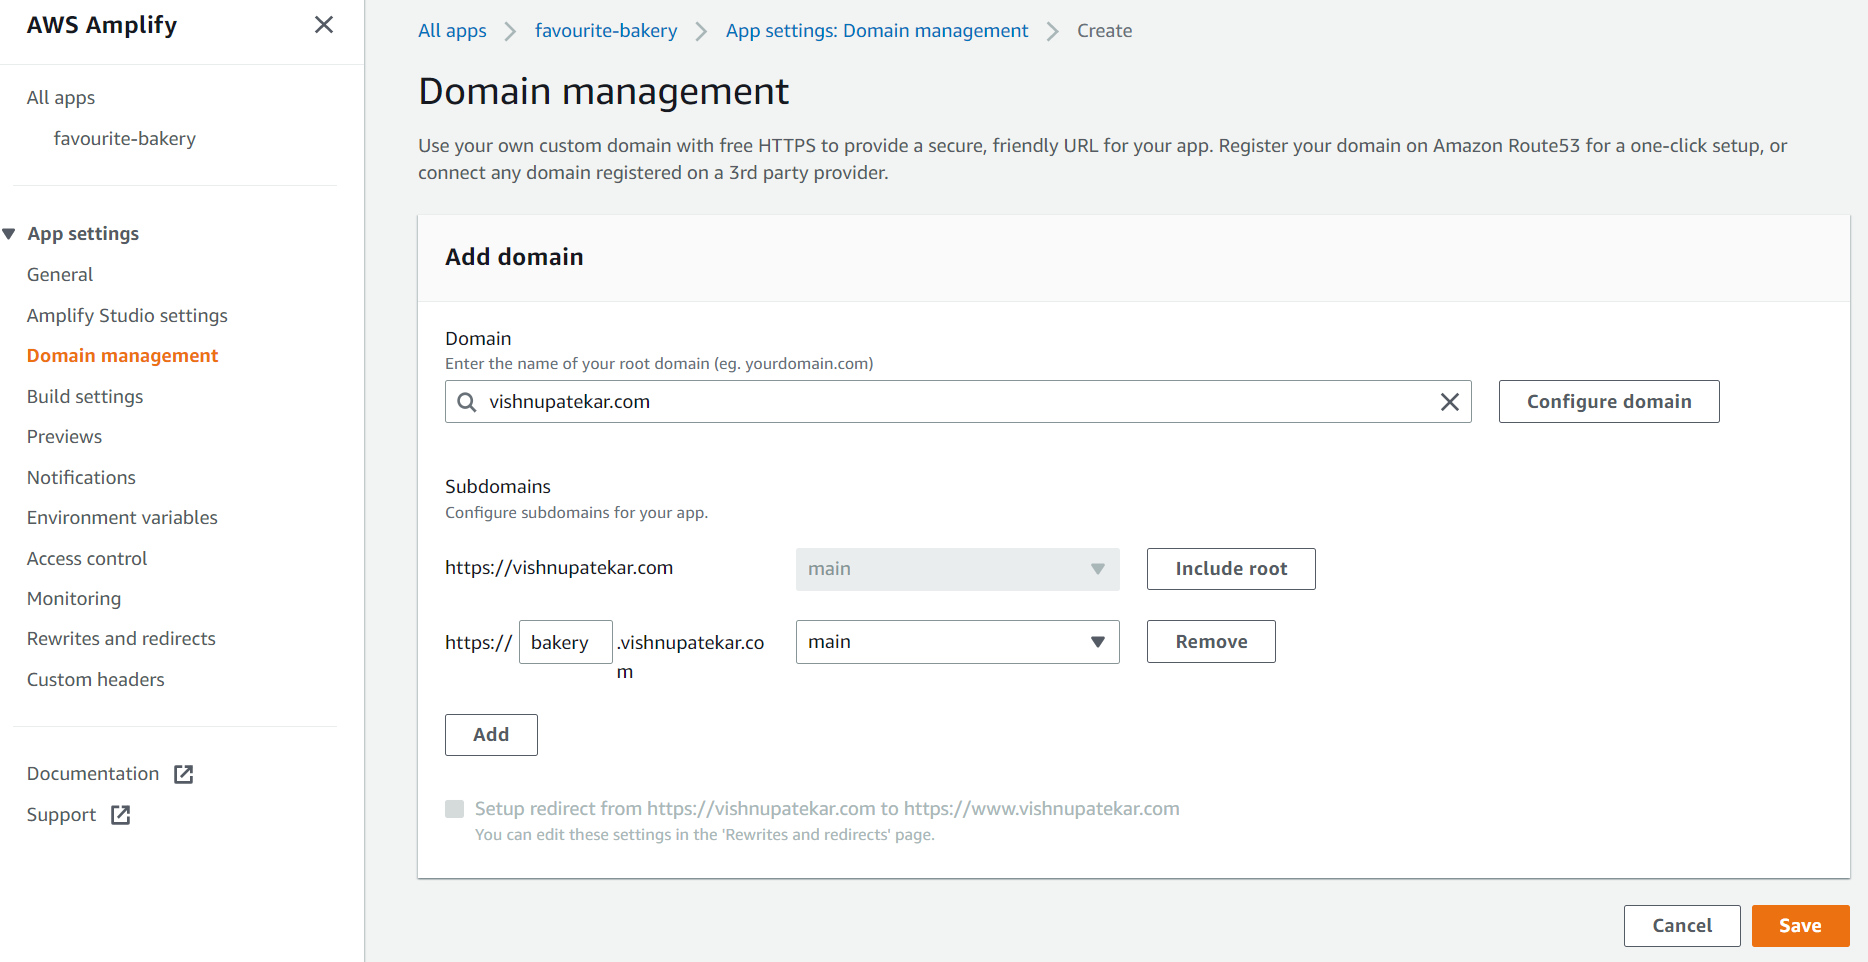
You need to add the CNAME record to your domain, we'll use a subdomain here, If your domain is registered using AWS Route 53, It'll automatically do the SSL Congiguration
i.e. https://www.bakery.vishnupatekar.com
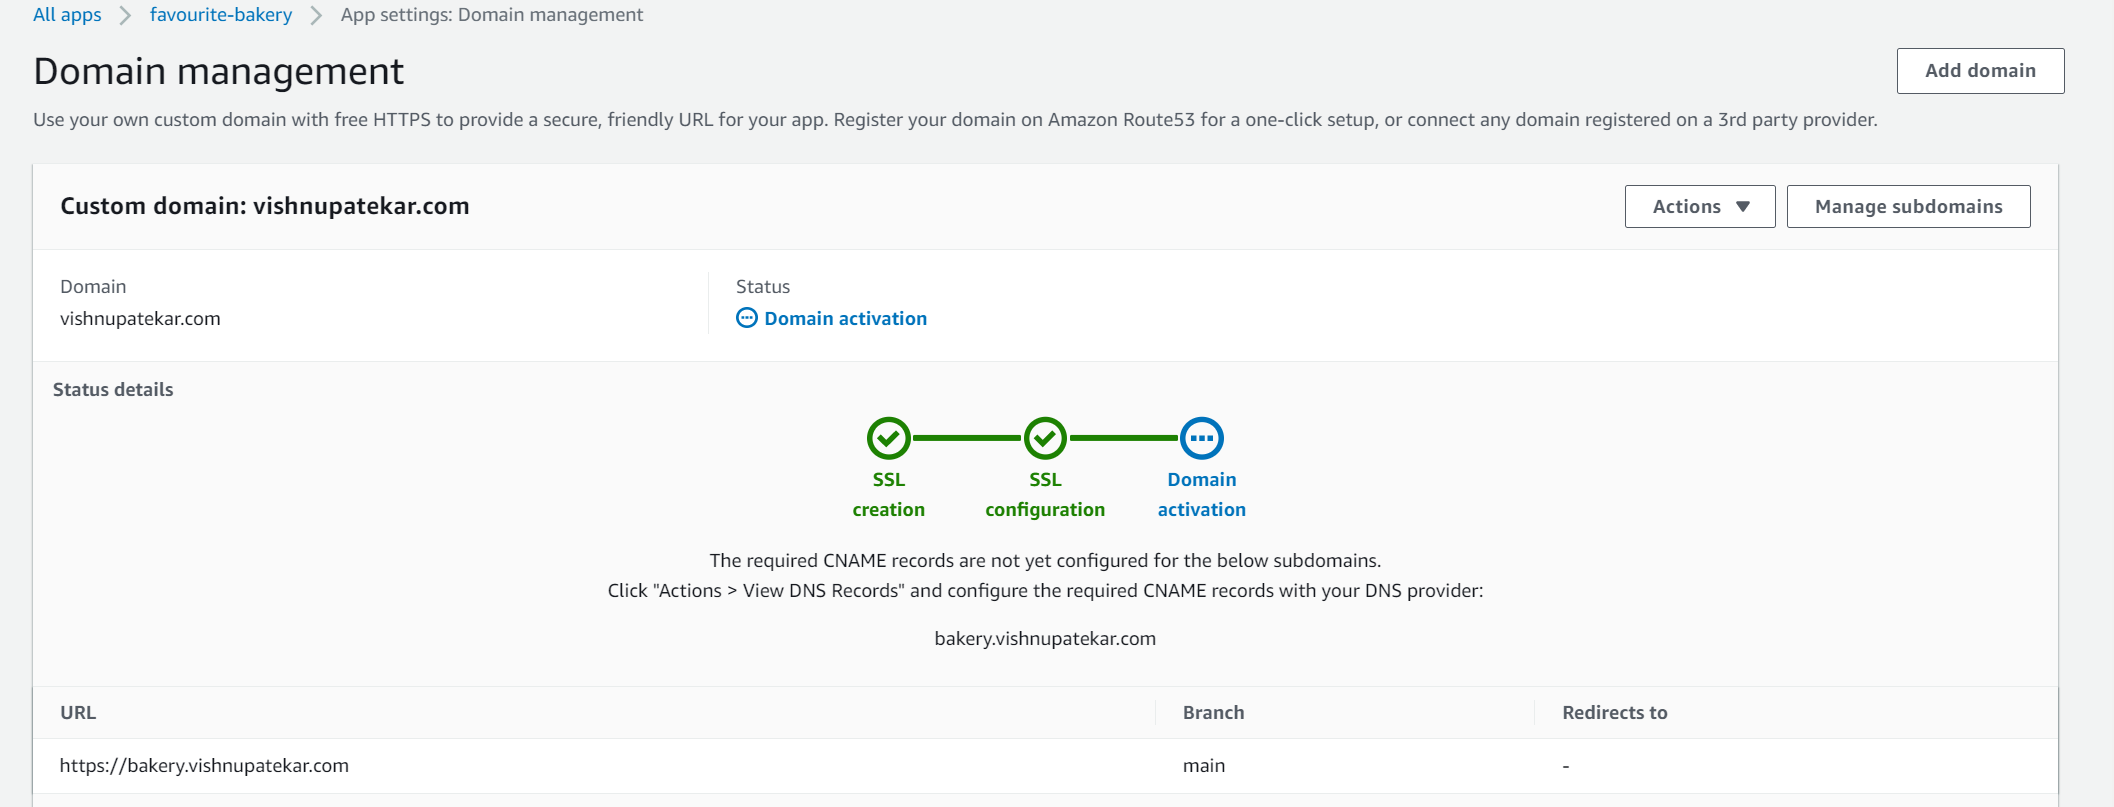
Now we just need to create a CNAME record for subdomain and redirect it to cloudfront URL.
bakery CNAME d3g1ldgx3o2or8.cloudfront.net
Let's goto Route 53 and add the CNAME record.

Wait for a few minutes, if your build was successful, you should be able to see our web app front page